A step-by-step guide with screenshots and video tutorial on how to root Google Pixel 7 and 7 Pro with Magisk v25.2 without bricking your device.
It is really simple to root your device, first you need to unlock the bootloader and then download/ install the magisk apk on your phone, then factory image file to extract the init_boot.img file and patch it with magisk and then flash it using adb command on your PC. Read the complete instructions below on how to safely gain root access on your device.
Before we begin, it’s important to note that rooting your device can be a complex and potentially risky process. It can void your warranty and potentially harm your device if not done properly. Please proceed with caution and at your own risk.
How to Root Pixel 7 and 7 Pro Video Tutorial:
Step 1: Backup Your Device
Before beginning the rooting process, it’s important to back up your device. This ensures that all of your data, files, and settings are safe and can be restored in case something goes wrong during the rooting process. There are many apps and methods to backup your data, including Google Drive, Google Photos, and other backup apps.
Step 2: Download Required Files
Before we can start the rooting process, we need to download some necessary files. First, we need to download the Android SDK Platform Tools from the Android Developers website. This provides the ADB and Fastboot commands necessary to unlock the bootloader and flash the Magisk patched boot image. Next, download the Magisk Manager APK from the official Magisk website.
- Google Pixel 7 or 7 Pro Factory Image
- Google Platform tools
- Google Pixel USB Drivers
- Magisk Apk from official Github
Step 3: Unlock the Bootloader
Now to root your device, it is really essential to unlock the bootloader first. This process will wipe all of the data on your device, so make sure you have backed up your data before proceeding.
- Enable developer options on your device. To do this, go to Settings > About phone > Build number and tap it seven times until you see a message saying “You are now a developer!”
- Go to Settings > System > Developer options and enable USB debugging.
- Connect your Pixel 7 in fastboot mode to your computer with a USB cable. Power off and press and hold the Volume down + Power keys together:

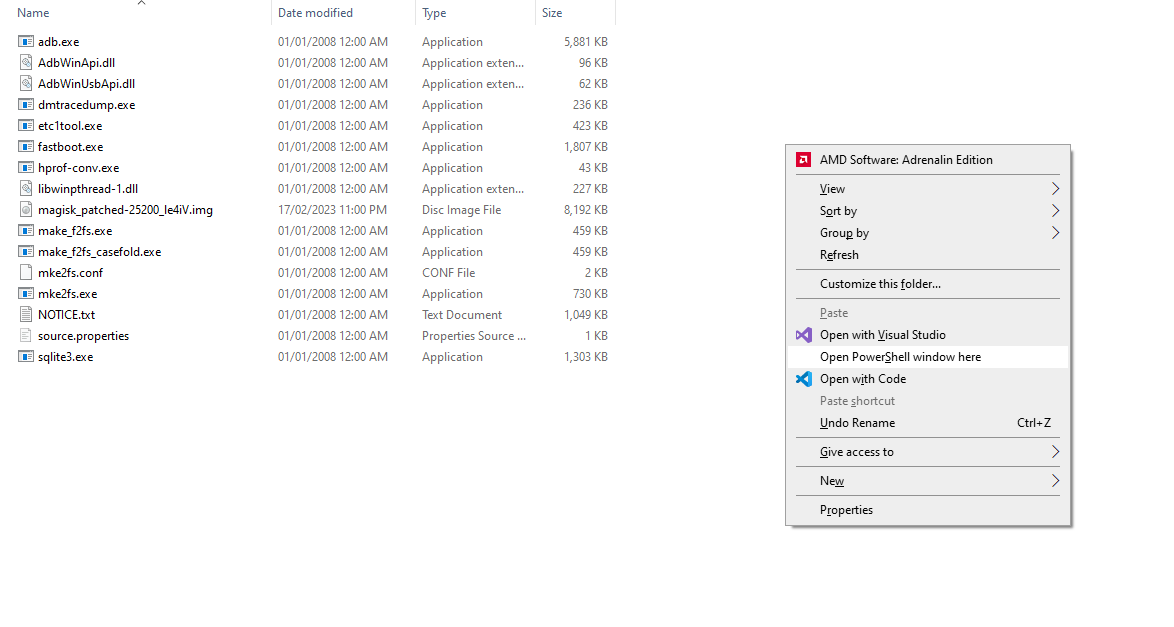
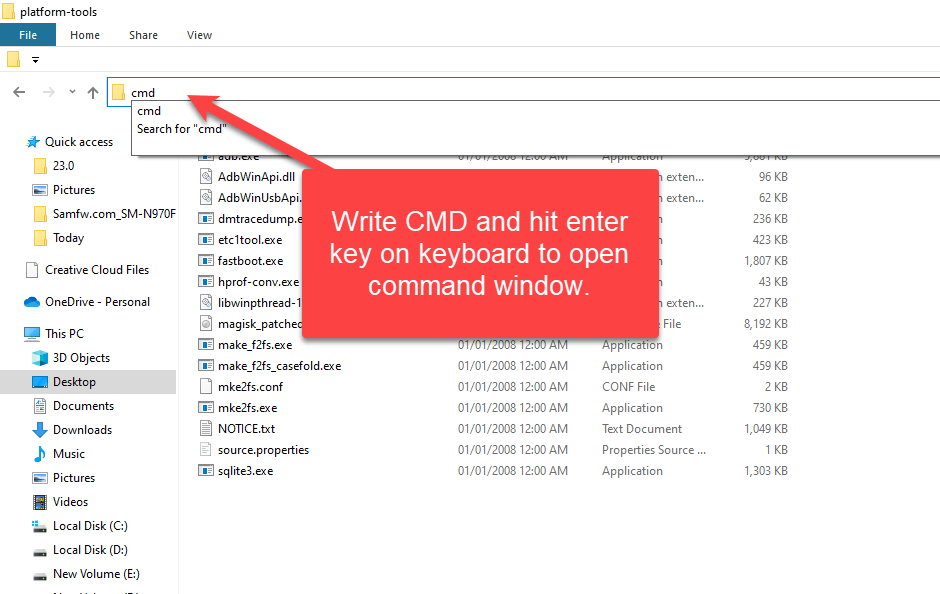
- Open a command prompt or terminal window on your computer and navigate to the directory where you installed the Android SDK Platform Tools folder. Hold Shift key and right click in the folder and click on open command window here, see screenshots I have given 2 methods:


- Enter the following command:
adb devicesto make sure your device is detected. - Enter the following command to reboot your device into bootloader mode:
adb reboot bootloader - Once your device is in bootloader mode, enter the following command to unlock the bootloader:
fastboot flashing unlock - Follow the on-screen instructions on your device to confirm the bootloader unlock. This will wipe all data on your device and reboot it.
![]()
Step 4: Patch the Boot Image with Magisk
Now that we have unlocked the bootloader, we can proceed to patch the boot image with Magisk.
- Extract the factory image file to a directory on your computer.
- Open the extracted directory and locate the init_boot.img file.
- Copy the init_boot.img file to your phone’s internal storage.
- Open the Magisk Manager app on your device and click on “Install”.
- Click on “Install” again and choose “Select and Patch a File”.
- Navigate to the init_boot.img file you copied to your phone and select it.
- Magisk will patch the boot image and create a new file named “magisk_patched.img” in the Downloads folder of your device.
- Copy the patched init_boot.img file to your PC again.
Step 5: Flash the Magisk Patched Boot Image
Now that we have the Magisk patched boot image, we can proceed to flash it to our device.
- Connect your Pixel 7 to computer with a USB cable in fastboot mode.
- Open a command prompt or terminal window on your computer and navigate to the directory where you installed the Android SDK Platform Tools.
- Once your device is in bootloader mode, enter the following command to flash the Magisk patched boot image:
fastboot flash boot /path/to/magisk_patched.imgReplace “/path/to/magisk_patched.img” with the actual path to the Magisk patched boot image file. For example, if you copied the patched boot image to the Downloads folder on your phone, the command would look like this:fastboot flash boot /sdcard/Download/magisk_patched.img.

- Once the flashing process is complete, reboot your device by entering the following command:
fastboot reboot.
Step 6: Verify Root Access
After your device reboots, you should now have root access. To verify this, you can use an app like Root Checker from the Google Play Store.
- Download and install the Root Checker app.
- Open the app and click on “Verify Root”.
- If the app displays a message saying “Congratulations! Root access is properly installed on this device”, then you have successfully rooted your Pixel 7.
![]()
Congratulations! You have successfully rooted your Google Pixel 7 or 7 Pro with Magisk. With root access, you can now install custom ROMs, modify system files, and take full control of your device.
