After a long time, LG has released 8.3-inch screen size tablet, which has received a good feedback in the market. If you’re one of those, who owns this amazing Android tablet, probably you would be looking for Rooting and Custom Recovery installations tutorials to make it to the next level by installing Custom ROMs, Mods and Kernels. Thanks to the xda developers community, who in the early days have managed to release a root exploit for the LG G Pad 8.3. Follow the instruction in order to safely and successfully do it.
Guidelines:
1. Rooting your tablet will definitely voids your warranty.
2. The Rooting tutorial is only applicable for LG G Pad 8.3. Do not try it on another LG device.
3. Enable USB Debugging from Settings> Developers Options.
4. Make sure you’ve installed the USB Drivers on your PC. If not then Download From Here.
5. You need to make sure that you have enough battery charge on your phone.
6. Warning!! Last but not the least, Proceed at your own risk.
How to Root and Install TWRP Recovery on LG G Pad 8.3
Procedure #1:
Steps to Root Using Kingo Root App
Kingo Root is an application, which is 1 click Root method to easily get Root Access on your Android Phone, Apart from LG G Pad 8.3, it also can used to root many other Android Phones and Tablets.
1. First Download the Kingo Root and install it on your PC.
2. When application is successfully installed, double click it to launch it on your PC.
3. Connect your tablet to PC via the USB Cable. If you haven’t installed drivers, it will automatically installs it.
4. After then you should see the Root notifications on your screen, read it carefully and then hit the Root button to start the process.
5. Just wait and when it completes you’ll be notified via the Root Succeeded message.
6. That’s it, You’ve now successfully got Root Access on your LG G Pad 8.3 Using Kingo Root.
If for some reasons, this method is not suitable for you, you can also check the second method to get root access.
Procedure #2:
This Root package is specifically modified by an XDA member, for LG G Pad, and is also the easiest way to get Root access within a few clicks.
Steps to Root LG G Pad 8.3
1. This method is only for Windows users only.
2. First Download the Root Package.
3. Extract the root_gpad folder on your desktop.
4. Connect your tablet to PC via the USB Cable and make sure it is recognized and has established connection with your PC.
5. Now run the root batch file.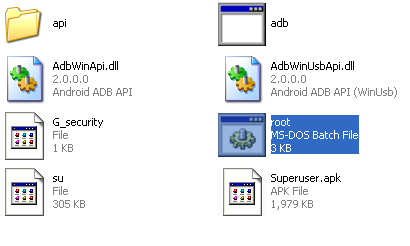 6. Carefully read the instructions and guidelines on the command window and then proceed to hit any key on your keyboard to start the process.
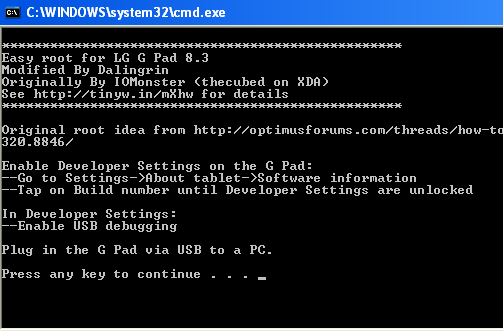 7. Within a few minutes, it should be completed with a successful notification on the screen the process has successfully been completed and you’ve got Root Access.
Now when you’ve got Root Access, you may also want to Flash a Custom Recovery, which will be used to Flash Custom ROMs. Follow the instructions to Flash the CWM or TWRP Recovery on LG G Pad 8.3:
Steps to Flash Custom Recovery on LG G Pad 8.3
1. You should know that there 2 types of well know Custom Recoveries for Android Phones and Tablets and those are:
- ClockworkMod [Download Link]
- TWRP Recovery [Download Link]
Depending on your choice of Recovery, Download the one suitable for you.
2. Extract the download folder on your desktop.
3. Make sure your phone is connect to PC.
3. Same like before, run 1-click-cwm-recovery-installer the batch file.
4. Read the notification and hit any key to continue.
5. Follow the on screen instructions and that’s it you’re done installing the Custom Recovery.
That was all you need to know, in order to successfully Root and Install Custom Recovery on your LG G Pad 8.3. It was at the end, an easy tutorial, Hopefully you’ve got successful in your attempt. For More Tutorials, stay tuned to Android Central.

Sorry for the late reply as your comment was caught as spam. Actually after running the batch file there are given instructions you can follow on the screen. What about the USB Drivers? Have you installed the USB Drivers? also make sure you’ve enabled USB Debugging.
If that also does not work, then why you’re not using the Kingo Root method as stated in the Procedure#1? have tried that one?
Strangely there were no instructions after running the batch file.
I later found out that using twrp-2.6.3.0 has a known bug which was patched with 2.6.3.2. So I need to install that recovery image and then I can put CM11 on 🙂
Kingo Root worked beautifully though – that’s what I used at the start.
I also discovered that to boot into recovery I needed to do the following commands:
# su
# system/bin/reboot recovery
And that got me in there. I must work out what the LG G Pad hard key combination is though 🙂
Installing the ROM Manager will make your life easier, Using which you can Easily Reboot into Recovery Mode and also Flash CWM/TWRP Recovery and additionally you can Flash Custom ROMs from the top developers like CyanogenMod and so on.
Cool. Thanks for the tip, I’ll check it out.
I can’t seem to get TWRP installed. When I type
dd if=/sdcard/openrecovery-twrp-2.6.3.0-awifi.img of=/dev/block/platform/msm_sdcc.1/by-name/recovery
(after getting root access)
it just says: -2.6.3.0-awifi.img of=/dev/blocl/platform/msm_sdcc./by-name/recovery
/sdcard/openrecovery-twrp-2.6.3.0-awifi.img: cannot open for read: No such file or directory
Any thoughts? Any help would be much appreciated.
I already tried to root my LG G Pad 8.3 with one click root and it works so great with me, But I also have a LG K10 K430DSY just now and I know to root this using your tools. Let me know if your tools compatible with my android.