This is the time to Root your Moto X and unlock its potential. Today, I will guide you, How to Root your Moto X using the MotoRoot, which is I believe one of the easiest ways to Root your Android device. If you’re one of those, who don’t want to mess with their device, then it is the best, recommended and easiest way to Root Moto X.
Before we move on further, It is recommended that you read the guidelines and prerequisites, in order to successfully go through all the Rooting steps and Root your Moto X successfully.
Preparing Your Device
- Rooting your device, will void your Moto X warranty.
- Make sure you have installed USB Drivers on your PC. If not then download it from the download link given below, in the download section.
- You are also supposed to Setup ADB and Fastboot on your PC. Read Here: How to Setup ADB and Fastboot on Windows.
- Enable USB Debugging on your Moto X.
- Last but not the least, You’re doing this at your own risk, we do not take any responsibility if something goes wrong with your device. (Note: It has been tested and is proven to be working 100%).
Files Required:
- Click Here to Download USB Drivers for your PC.
- Click Here to Download the MotoRoot App for your Moto X. (Make sure to choose the correct carrier for your device.
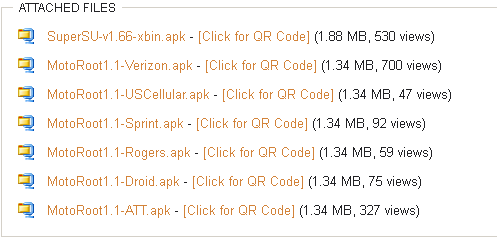
- Click Here to download SuperSU modified for Moto X.
Root Moto X using MotoRoot
1. First of all make sure, you’ve downloaded the exact carrier version of MotoRoot for your Moto X.
2. At this point, I assume that you have setup ADB and Fastboot on your PC. You can now connect your Moto X using the Data Cable to your PC.
3. Now open the command line window, by going to START Menu->RUN->Type ‘cmd’ and enter.
4. In the command prompt type the following commands:
adb install -r MotoRoot1.1-Carrier.apk
(You need to replace the carrier word with your exact carrier, like if you’ve Sprint then type ‘adb install -r MotoRoot1.1-Sprint.apk‘).
5. Now enter this command to flash the SuperSU app on your Moto X:
adb install –r SuperSU-v1.66-xbin.apk
6. By now you’ve installed the MotoRoot and SuperSU App on your Moto X.
7. On your Moto X, Launch the MotoRoot App, you can then tap the ‘Setup (Will Reboot).’
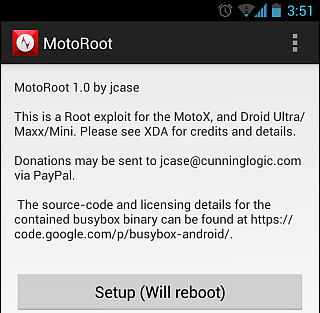
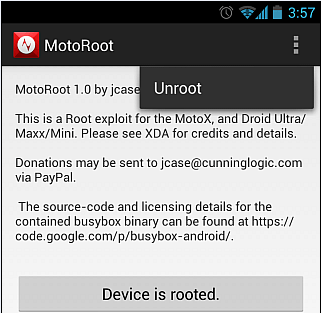
8. It will then Root your Moto X, your device will also reboot during the process.
That’s it folks, how easy it was, to Root your Moto X using the MotoRoot App, later you can also Unroot your Moto X. One thing more, make sure to check SuperSU app is installed on your device, and you can also install the Root Checker app from Google Play Store, to verify root access.
At the end, hoping that, on the other side, everything went perfect for you and you’ve easily got root access on your Moto X, you can also share your experience with us in the comment section. For more Root Tutorials and Tips and Tricks, stay tuned to Android Central.

Hello, I’m attempting this method with a Droid Maxx.
When attempting to install ‘C:/MotoRoot1.1-********.apk’ I receive this message:
C:Users*********>adb install -r C:MotoRoot1.1-*******.apk
4193 KB/s (1404990 bytes in 0.327s)
pkg: /data/local/tmp/MotoRoot1.1-********.apk
Failure [INSTALL_PARSE_FAILED_NO_CERTIFICATES]
Please respond directly or to me privately via email at ‘[email protected]’.
Thank you for the guide and your time to respond.